Wacky Holiday Hop - August
National Oyster Day
Good day, fellow crafters. Today I am presenting my entry into the monthly Wacky Holiday Hop on IG sponsored by @missmissamakes! Each month we all come up with a wacky holiday card for a celebration that falls within that month. For the month of August I have chosen National Oyster Day. This is a celebration dedicated to oysters, a type of bivalve mollusk often enjoyed as a delicacy around the world. Observed on August 5th each year, the day highlights the culinary and cultural significance of oysters in various cuisines. It's a time for oyster enthusiasts to indulge in these shellfish, whether raw on the half shell, cooked, or incorporated into diverse recipes. The day also raises awareness about sustainable oyster farming and the importance of preserving oyster habitats for their ecological benefits. I hope you enjoy.
To craft the background panel of this card, I began with a captivating piece of hand-marbled paper that I had created. Its charm strongly evoked associations with fairytales, and I really liked the combination of colors. After trimming it to its desired dimensions, I paired it with a complementary purple mat and securely adhered them. This composite panel was subsequently affixed onto a pre-cut A2 white card base. With this foundation in place, I set it aside to direct my attention towards the remaining elements.
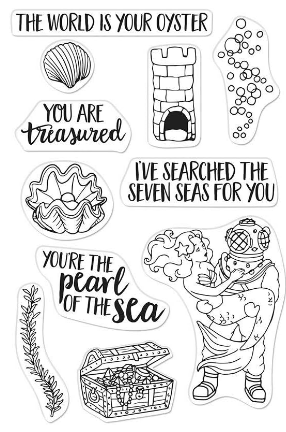
To create them I began with some HammerMill paper, VersaFine Claire Nocturne ink and the Hero Arts Under the Sea stamp set (CM-346), featured left. Once I had them stamped out I used the colors in the gallery featured below to color the image in. To do this I smooshed out some ink from each pad, spritzed with water, then used my water brush pen to pick up the pigment and color in the images. I set these aside to dry thoroughly.
The next step in the process was to create the bottom of the scene. To do this I used a piece of white cardstock and employed the torn edge method to get a organic looking edge that would serve as my horizon line. I next covered it in clear embossing inks and then in Hero Arts Sand embossing powder. If you have not used this product before, you set it the same as other embossing powders, so I used my heat tool and set it till firm.
Once it cooled I took sandy bottom and positioned it along with the other elements to create my underwater scene. Once I had them all in place I recognized that my diver need an air hose so I added that using a black micro tip pen. Then I came to the realization that I needed to give the diver some air bubbles. To accomplish this I added some flat-back iridescent bubbles from Studio Katia which really help to seal the look. I next added the piece de resistance, I tucked a little flat-backed pearl into the giant oyster. Finally out of the same purple cardstock as the mat I used a stitched sentiment die to cut out my banner. The sentiment is from the Under the Sea set and was stamped in clear embossing ink, covered in fine black embossing powder and heat set till firm.


