Winter Birthday
Themed Friday Instagram Hop #22
Good day, fellow crafters. Today I present to you my submission to the Themed Friday Instagram Hop # 22! Today we are celebrating Winter Birthdays! We hope this theme encourages you to let your imagination run wild and is a crafting change of gears after weeks of mistletoe and Santa cards! If you are inspired to create as well then be sure to post to IG and add the hashtag #themed_fridays_card_making_fun to your post!! If you’d like to join our fun little group please message @touchofmagik . Our next Themed Friday Hop will be on January 5th 2024!!
My theme centers around the atmosphere that hums with vibrant energy as balloons, streamers, and banners unite in a riot of hues, creating a visually stimulating birthday experience. The air is filled with the sweet scent of freshly baked treats, while the crisp rustle of wrapping paper and the distant laughter of children amplify the wonderful ambiance all the while Mother Nature is putting on a spectacular winter show. I hope you enjoy my submission.
The first phase in creating this card was to begin with the background panel. To stick with the theme of “Winter Birthday” I decided to create a winter wonderland scene as if the viewer sees it outside the window of a home where they were attending a birthday party. I started with a piece of white cardstock, and on the upper two-thirds of the card, I used leftover inks on a few of my ink-blending brushes to create an early evening sky. I then incorporated the Hero Arts Winter Woods stamp set, featured left, to add a snow ground layer on the lower third. Next, I used the single tree, fox, and rabbit stamps from the same set to finish off the outdoor scene stamped in Jet Black Archival Ink. I then allowed it to dry.
The second phase was to create the shaker card portion of the card. To do this, I began by placing a piece of brown cardstock into the Park Lane Diagonal Strip embossing folder and running it through my Gemini die-cutting machine. Then using the window die from the Gina K Master set #11, I cut out my foreground element. Next, I cut out a piece of acetate to act as a cover and glued it to the back of my window frame with Bearly Art liquid glue. Using foam tape, liquid glue, and the background panel I framed in the scene, then added some glitter and sealed up the shaker portion by adhering the shaker window.
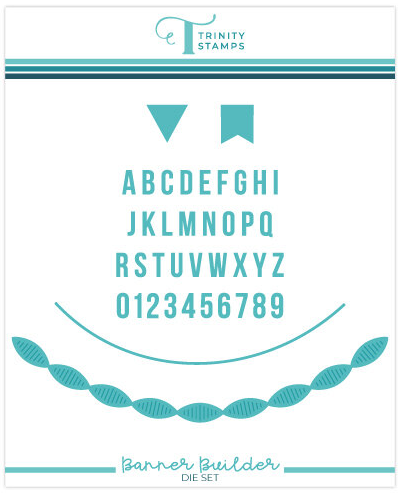
The third phase was to create the foreground elements. For these, I turned to the Sizzix ThinLits die set featured right. This is my go-to die set for creating birthday party elements. I also utilized the streamer die that was part of the Trinity Banner Builder die set, also featured right. For the pennants, however, I turned to my Cricut Maker to design, label and cut them out to match the scale of the card. Copic markers were then used to color them in a rainbow order. I then used some black thread as the banner string and glued each letter into place with some liquid glue. After all of the elements were created, I used some Ink on 3 Liquid Pixie Dust on the balloons to give them a plastic-like look and then adhered everything into place.
The final phase was assembly. I used double-sided tape to adhere the panel to a white card base, sized to be covered completely. With that, I called the card complete.
Note: Please be aware that I don't have any sponsorship arrangements with the suppliers mentioned in this post; I simply appreciate and frequently use their products. To support the creation of more content like this, I've included affiliate links for some of the featured supplies. Utilizing these links won't incur any additional costs for you, but it does provide a small benefit to me, allowing me to continue sharing my work with you.


