National Hot Chocolate Day
January National Holiday Hop 2024
Good day, fellow crafters. Today I present to you my submission to the January National Holiday Hop 2024 on Instagram. Today's theme is "National Hot Chocolate Day" and we are hopping along between creators using the hashtag #nationaljanuaryholidays2024. If you are inspired and want to contribute be sure to use that tag when you post. It will allow us to see your work. If you want to be involved in the next hop just message @kellys.craft on IG. Our next hop date will be the 2nd of Feb and the theme will be "National Hedgehog Day".
In the United States, chocolate houses serving hot chocolate began to appear in the 18th century. By the 19th century, advancements in chocolate production and commercialization made hot chocolate more accessible to the general population. The comforting and indulgent nature of hot chocolate led to its association with warmth and joy, especially during cold winter months. The decision to designate January 31st as National Hot Chocolate Day may have stemmed from a collective desire to celebrate this delightful beverage during the heart of winter. It provides an opportunity for people to enjoy a comforting cup of hot chocolate, whether homemade or from their favorite cafes, and share the experience with friends and family. I hope you enjoy.
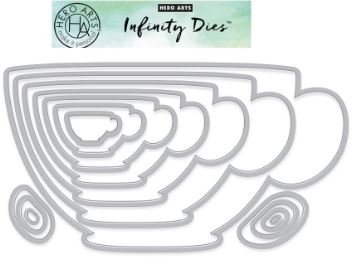
To create the scene for my card I first began with a piece of patterned paper from my collection that reminded me of one of my grandmother’s china cups and the Hero Arts Nested Teacup die set, featured left. Using my Gemini die-cutting machine and a die sized appropriately for an A2 card and its corresponding handle die, I cut the image out and set it aside.
The next step was to create the background panel. My design choice for this was to use a light pink cardstock that matched the small pink florals of the teacup. I next trimmed the cardstock down to fit inside of the Gina K Swiss Dots embossing folder, featured right, lightly misted the back of the cardstock with water to soften the paper fibers, and then ran it through my Gemini a couple of times to ensure a crisp image transfer. I feel that the added moisture is a must with intricate details and the larger 3D folder as it helps to prevent tear out. Since incorporating this technique it has not happened to me again.
The next step was to trim the background panel down to its final dimension as well as a gray mat that helped to make the pink cardstock pop. I then adhered them together and then the composite into place on a white card base with Bearly Arts liquid glue. Once that was dry I adhered the tea cup into place.
The next step was to simulate whipped cream on top and a little cinnamon. To do this I used Ranger’s Texture paste and a small pallet knife. I deliberately added a healthy dollop of the paste and spread it around to look the way I wanted. I then used some Nuvo embossing powder sprinkled on top for the final touch.
The last step for this card was to add the sentiment. For this, I chose the Pink Fresh Studio Reason to Smile Wreath stamp set which is featured left, VersaMark watermark ink, and Wow! white embossing powder which I set with my heat tool on more of the gray cardstock. I then used liquid glue to adhere it to the background panel. With that, I called this card complete.
Note: To support the creation of more content like this, I've included affiliate links for some of the featured supplies. Utilizing these links won't incur any additional costs for you, but it does provide a small benefit to me, allowing me to continue sharing my work with you.


