Create It Three Ways IG Hop
Spooky Halloween

Good day, fellow crafters. Hello and welcome to the Create It 3 Ways IG Hop! We are sharing triple the inspiration! This is a monthly hop on every 3rd Saturday at 3 PM ET – please message @amritapettus for more info if you’d like to join us. Each month we challenge ourselves by choosing our own category to feature across all 3 cards. I chose to feature Spooky Halloween. I hope you enjoy my submission to these challenges.

The concept behind this Instagram hop involves creating three cards using identical materials but in three distinct ways. While other participants in this hop, whom you can follow via my Instagram handle @forgetmenotcardco, might opt for diverse scenes or completely different applications of the materials, I decided to maintain the same scene while exploring varied visual angles in my designs. I think this gives a cohesiveness to the cards that really helps to make them stand out.
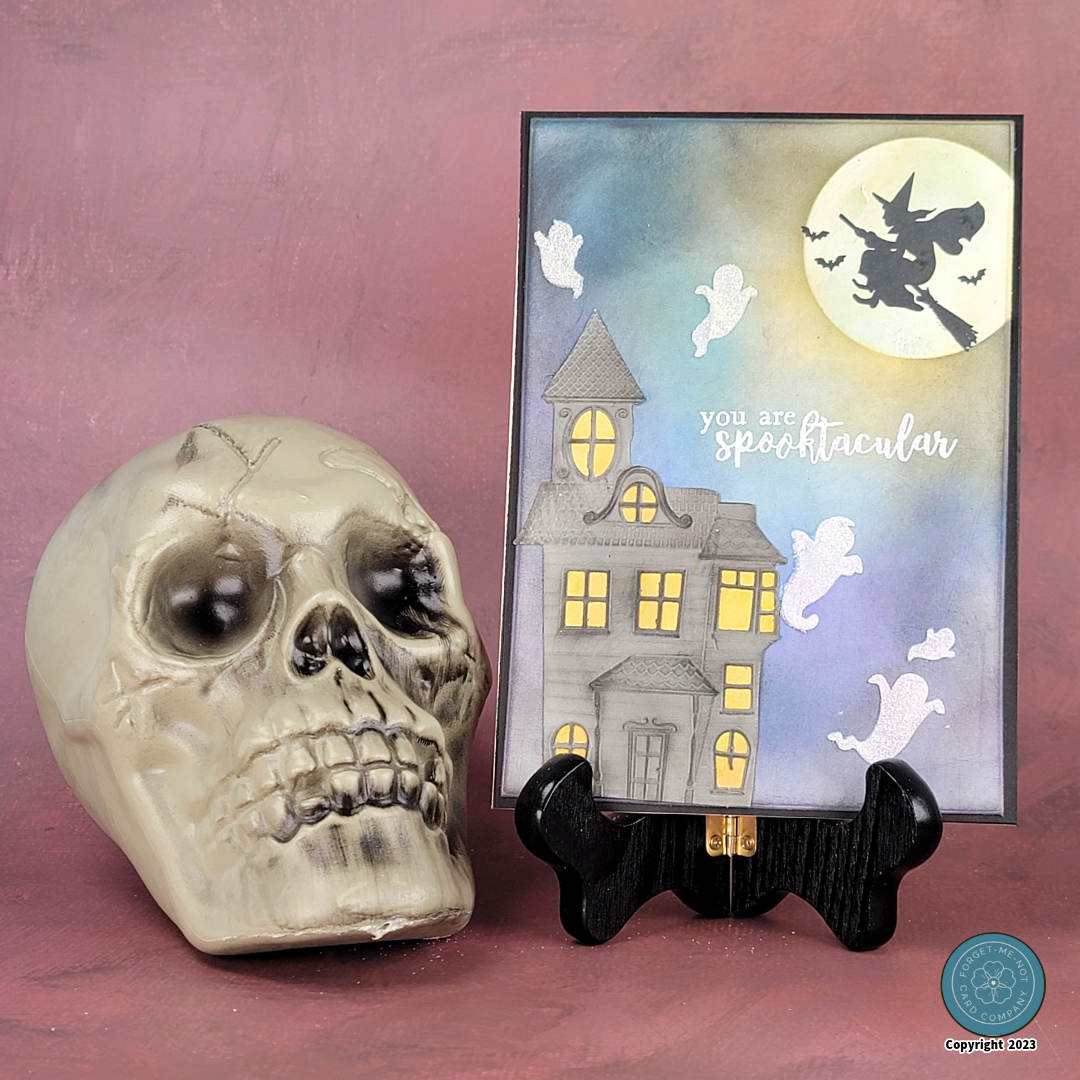
The first step in the process was to create the background panels for these cards. If you have followed my blog for any amount of time you already know this but I am very averse to waste. I try very hard to reuse everything I possibly can and in this case I did this with the backgrounds. Here is what I did. I started with where I wanted my moon to be located on these cards, and utilizing a circle stencil and a dedicated ink-blending brush for the color yellow, I filled in the moon. I then removed the stencil and completed the same thing for the other panels. I next applied the solid circle that comes with the circle stencil over the newly created moon and used the rest of the excess ink left on the brush to make the shine around it. This had the benefit of creating a soft glow around the moon and also cleaning the brush at the same time. I next completed the same steps for the sky with ink-blending brushes I have dedicated to the colors blue and purple. The last thing I did for the panel was to add a little of Distress Oxide’s Black Soot to the edges to give it a darker feel.
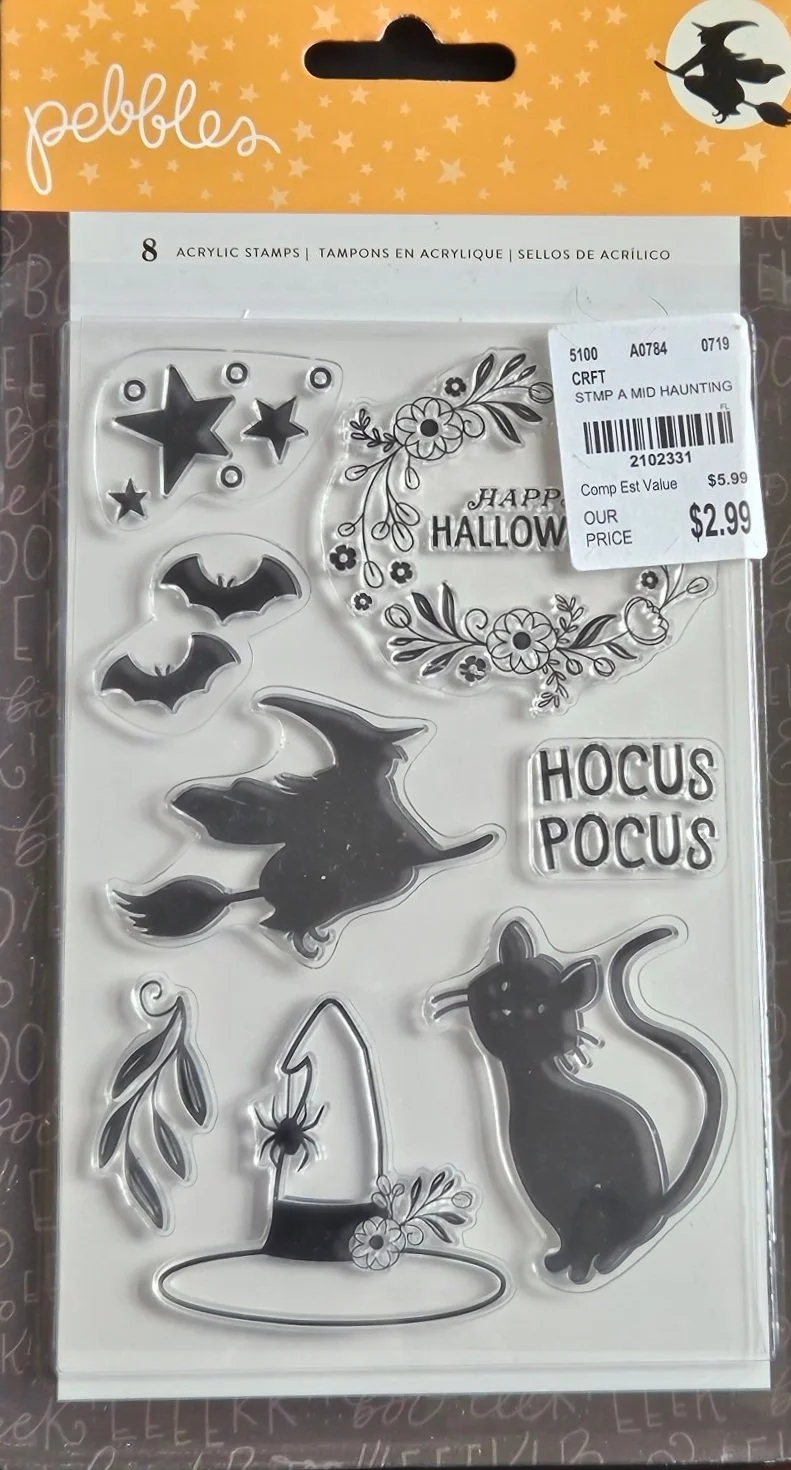
In the next phase, I carefully positioned my witch using the Peebles Midnight Hauntings stamp set, as shown on the right. Utilizing my Misti stamping tool, I ensured the witch and the accompanying bats were placed precisely where I intended them on each panel. I stamped each panel multiple times using the Black Soot ink. It's worth mentioning that although the images in this stamp set are well-defined, they appear slightly smaller than their silhouettes on the packaging. For instance, I wished the bats were a bit larger, but they still turned out incredibly cute. If you're interested in obtaining the same stamp set, which I acquired during a clearance sale, you might need to consider buying it secondhand, as it wasn't available on their website at the time of writing this blog post.

The next step was to create my haunted house. To achieve this, I utilized the Simon Says Stamp Haunted Manor Die and Embossing folder set, as shown on the left, along with some gray cardstock. Initially, I cut out the shape using the die and then lightly misted the back of the cardstock with water to add moisture to the paper fibers. This technique prevents tearing and allows the cardstock to bend smoothly. I employ this method in all my cardstock embossing projects and have consistently achieved excellent results. After misting the paper, I carefully aligned it within the accompanying embossing folder and passed it through my die-cutting machine multiple times to ensure a sharp and well-defined impression.
After I removed it from the embossing folder I used a little more Black Soot to give the image a weathered look. To make it look a bit more “lively” (see what I did there 😁) I used white cardstock and applied Distress Oxide in Yellow to create the illusion of a lit-up house. Then, I incorporated Distress Oxide in Wild Honey along the base of the windows, giving the impression of candlelight flickering inside.
Once I had completed the haunted house, I carefully positioned it on the background panel to capture various perspectives of the scene I aimed to create. After ensuring they were in the desired spots, I secured them in place using liquid glue. With the house firmly in place, my next task was to position the sentiment. For this, I selected a phrase from one of my Halloween sets. Using clear embossing ink, I stamped the sentiment onto the background panel. I then sprinkled white embossing powder over the inked phrase and set it with my heat tool, creating a crisp and embossed message on the card.

Having finished the previous steps, I proceeded to the final phase of crafting the background panels, which involved adding the ghosts. I opted for the ghost stencil from Newton’s Nook Designs, as shown on the left, due to the wide variety of options it offered in terms of size, placement, and style of the images. To apply the ghosts, I positioned the stencil over the specific areas where I wanted each ghost to appear. Using a palette knife and some Gina K Glitter Glitz Gel in white, I smoothly spread the gel over the chosen ghost shape and then carefully lifted the stencil, leaving behind the ghost design. I repeated this process for all the ghost images, ensuring a consistent and appealing pattern across the panels. I then allowed the gel time to dry.
The last stage was assembly. I trimmed each panel down to its final dimensions along with a black mat for visual appeal. I adhered the two together with double-sided tape. I then used that final size to measure, cut, and fold a white card base that was custom to each of the cards. Once those were down I adhered the composite panels to the card base with double-sided tape. With that, I called these cards complete.